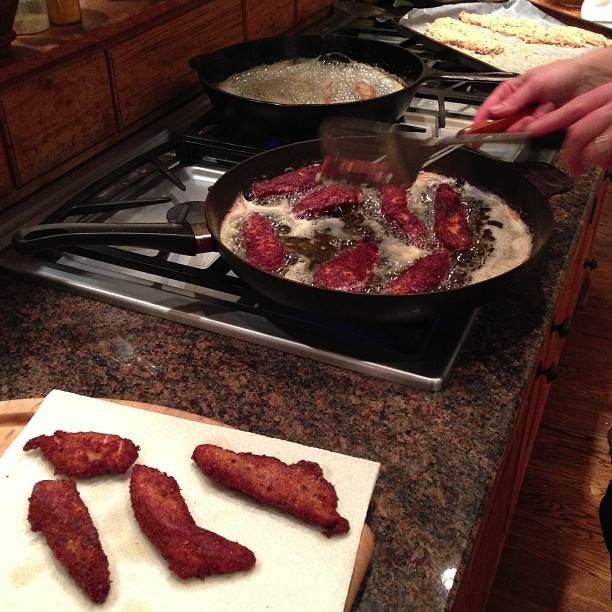
Ok, if you’re having trouble weaning your kids away from the neighborhood fast-food joint, or if you’d simply like to offer a delish-dish to the kids that will help them to sit happily at the table, then this recipe for long, crisp, savory chicken fingers is definitely for you! And, just to make things extra exciting (for all of you), I’ve provided three different dipping sauces. Also, don’t hesitate to serve these, with cocktails, before a casual dinner, when entertaining. The following recipes illustrate perfectly how easy it is to make a homemade dinner that’s truly memorable, and so simple!
Any time I’ve suggested a tool, a piece of equipment, or a culinary term that’s unfamiliar to you, you can go to Learn to Cook for more information.
Rinse and dry each chicken breast half and pull the tenderloin off, keeping it intact. Slice each breast half, lengthwise into 1-inch thick strips (you’ll get between two and three slices per each breast half, not including the tenderloin).
Place flour on a plate and season lightly with salt and pepper. Combine bread crumbs with Parmesan cheese, if using, on a shallow baking sheet. In a bowl, beat the eggs with a fork and place the bowl in between the flour and crumbs. Line a large shallow baking sheet with wax paper and place this next to the crumbs. (If making the oven-roasted version, omit the flour and just set up the beaten eggs and crumbs.)
Sprinkle prepared chicken strips lightly with salt and pepper. Dredge about 6 chicken strips in the seasoned flour, coating them well, and then shake off the excess. Dip floured chicken into beaten eggs to coat thoroughly. (If using the oven-roasted method, dip the seasoned strips of chicken directly into the egg (no flour) and then proceed.) Working with 1 egg-coated chicken strip at a time, lay it on top of the crumb mixture and turn to coat each side, pressing gently to help the crumbs adhere. Lay the heavily breaded chicken strip on the wax paper lined baking sheet. Continue with the rest of the floured chicken strips, then rinse and dry your hands and flour, dip and coat the remaining strips, as directed. Whether pan-frying or oven-roasting, cover the sheet with plastic wrap and chill for 2 to 24 hours.
Arrange a long double thickness of paper toweling on your kitchen counter, as close to the stove as safely possible. Heat a 12 to 14-inch nonstick skillet over medium-high heat and, when hot, add enough olive oil to generously coat the bottom of the pan.
When the oil is hot, but not smoking, add the flattened garlic cloves and let them become light golden brown, frequently pressing on them to flavor the oil. Remove the garlic with a slotted utensil and add 2 tablespoons butter to the pan, stirring, to disperse it evenly throughout the oil. When the butter is bubbling, but not at all brown, fry several breaded chicken strips at time, in a single layer, without overly crowding the pan. Fry the chicken until golden brown and crisp on both sides, 3 to 4 minutes per side. (Use a turning spatula occasionally to press gently on the top of each strip to encourage even browning.) When cooked through, drain each chicken finger on paper towels and place them on a hot serving tray. Continue frying the rest. If while frying, the butter ever becomes overly dark from an accumulation of crumbs on the bottom of the pan, dump out the oil and wipe out the skillet. Heat more oil and melt more butter before frying the next batch.
Set up the paper towels, as described for pan-frying. About 30 minutes before you plan to cook, preheat the oven to 425°F with the rack in the center. Place the breaded chicken fingers in a single layer on a large shallow baking sheet, that’s lined with aluminum foil. (You might need two pans. If so, and not using a double oven, position the racks on the upper and lower third shelves.) Melt 1 stick of butter in a small saucepan and, when hot, add the flattened garlic. Let the garlic cook gently in the hot butter, just until it gets light golden (pressing on it, as described previously). Remove the garlic. One at a time, lightly dip both sides of the strips in the flavored butter and place onto the prepared sheet. (You might not need all the butter.) Roast the chicken strips at 425°F for 15 minutes. Turn each strip over and roast for another 15 minutes or until crisp and no longer pink on the inside. Drain on the paper towels.
Serve the chicken fingers hot or warm, either on a warmed serving platter or stand them up in a short drinking glass, lined with some parchment paper. (The pan-fried version will be able to stand more erect than the oven-roasted ones.) Pass the dip(s), at the table.
The chicken can be breaded a day ahead and kept covered in the refrigerator.
You can fry the chicken fingers an hour or two ahead and reheat them on a wire rack set within a shallow baking sheet, at 375°F for 5 to 10 minutes.
All three dipping sauces can be made up to two days ahead and kept refrigerated, well covered.